Grok Bot is an AI employee platform from xAI (now SpaceXSI). You give each Bot a name and a job description. It remembers where it left off, opens a browser on a cloud computer shared across your account, logs in to websites, organizes files, and can start work on a schedule by itself. It suits long-running, repeating work.
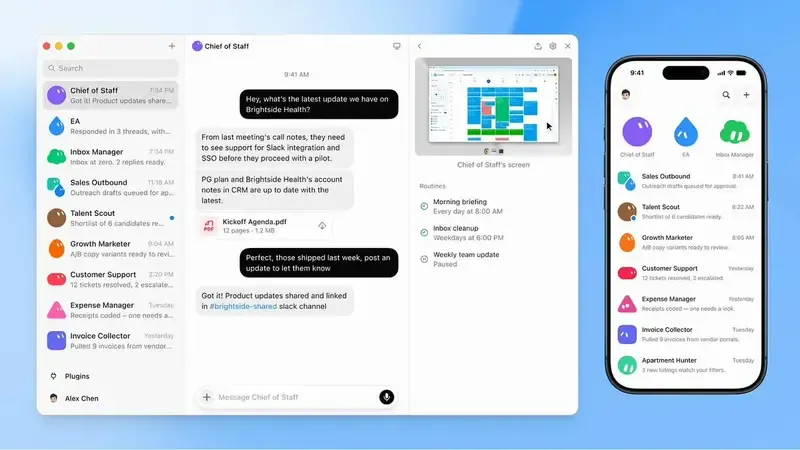
What Grok Bot Can Do
It works best on tasks that repeat every week and span several apps: sorting your inbox, producing a one-page morning brief each day, logging receipts into a spreadsheet, comparing prices and booking flights, and gathering material before a meeting. Real examples of how people use it and brief it are collected in 12 real Grok Bot use cases.
Grok Bot Pricing Plans and Usage
Starting October 12, 2026, new subscriptions can only choose The X Subscription. Grok Bot is included from Premium up, and the US$8 Plus tier does not include it (official details; prices are in US dollars, before tax):
| Plan | Monthly price (USD) | Weekly allowance |
|---|---|---|
| Premium | $30 | 4x Plus |
| Super | $100 | 15x Plus |
| Ultra | $200 | 50x Plus |
Team plans cost the same and are billed per seat. Under the new plans, each seat gets one weekly allowance, shared across Grok, Grok Bot, and the Grok models inside Cursor. The official docs do not publish a fixed token count. When it runs out, you can prepay credits to keep going, and you can also set a spending cap (usage details). For a full plan comparison, see Grok plans and pricing.
If you already have an old plan, you can keep using it the same way: Cursor Pro and above and Cursor Teams sign in directly with a Cursor account. SuperGrok, SuperGrok Plus, SuperGrok Heavy, or X Premium+ require linking your Grok account to your Cursor account, and once linked it cannot be unlinked or switched. SuperGrok Lite does not include Grok Bot. After an old plan’s allowance runs out, extra usage is billed pay-as-you-go by Cursor. Allowances from a Cursor plan and a Grok link do not add up; you get the higher one (Cursor details). New accounts with no eligible plan get a one-time trial allowance, up to 7 days.
Supported Devices
The desktop app is available on macOS, Windows, and Linux, and the mobile app on iPhone and Android (official getting started). Bots do their work on a cloud computer, so background schedules keep running even when your laptop is closed.
How to Use It: Build Your First Bot
In the sidebar, choose New → Create new Bot and give it a job title a human employee would have: inbox manager, content researcher, business development. A name like “assistant” is too vague.
Write the job in Description, in three parts:
You are my [job title].

// What you're responsible for
Sort my inbox every morning. Archive newsletters and receipts.
Draft replies to client emails. Flag any email that mentions
deadlines, invoices, or legal issues.

// What good looks like
Inbox cleared by 9 a.m. Drafts sound like me: short, direct,
no "I hope this finds you well." Replies of 4 sentences or fewer.

// Stop and ask me before going further
Never send any email on your own. Draft only.
Don't archive emails from my accountant or landlord.
If an email asks for a payment or for login details, stop and ask me.
Connect Tools and Log In
From Connect apps in the sidebar, connect tools such as Gmail, Notion, Slack, Google Drive, and GitHub. Manage the ones you’ve installed under Your plugins. For sites without a connector, the Bot works through its cloud browser. When a login or verification needs you personally, take over the screen to finish it, then hand control back to the Bot.
All Bots on the same account share one cloud computer, including files, browser logins, and app logins. A site you log in to for one Bot is also reachable by the others, so connect only the tools that are truly needed.
When you see a post on X you want handled, reply with @bot to assign it. The result stays in the Grok Bot app, and X only gets a one-line confirmation. You need to link your X account and create your own Bot first; see the official page for supported regions and post limits. If you don’t get a confirmation reply, the task did not go through.
Teach a Bot and Set Schedules
If a process is hard to explain, show it. In a conversation with a single Bot, open the computer screen, click “Teach a task”, and walk through the browser flow once (up to 10 minutes). The Bot generates a Skill draft. Schedule it once testing looks fine. If you don’t see that button, describing the process in text works too.
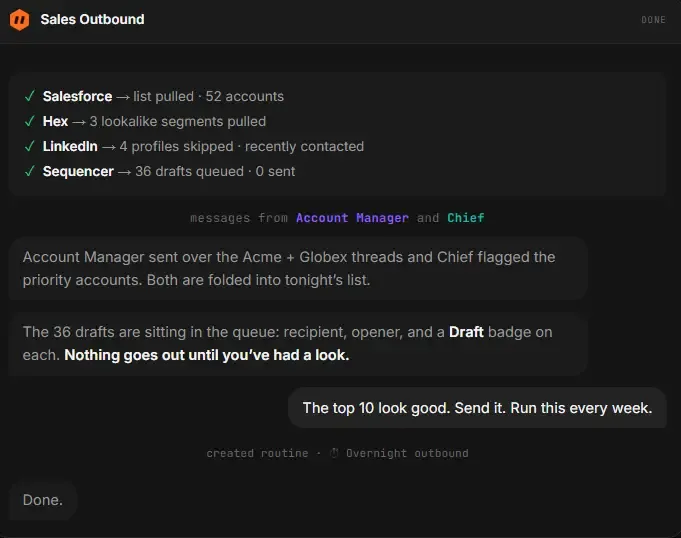
Hand work that runs smoothly over to a schedule (Routine). Just tell the Bot “every weekday at 8 a.m., sort my inbox”, confirm the time zone and next run time, and test once more. Event triggers such as Slack or GitHub need a separate Cursor account integration, apart from the connectors in the app. The minimum schedule interval is 5 minutes, each Bot can have up to 50 schedules, and the app keeps the last 20 runs of each schedule (official details).
Splitting Work Across Multiple Bots
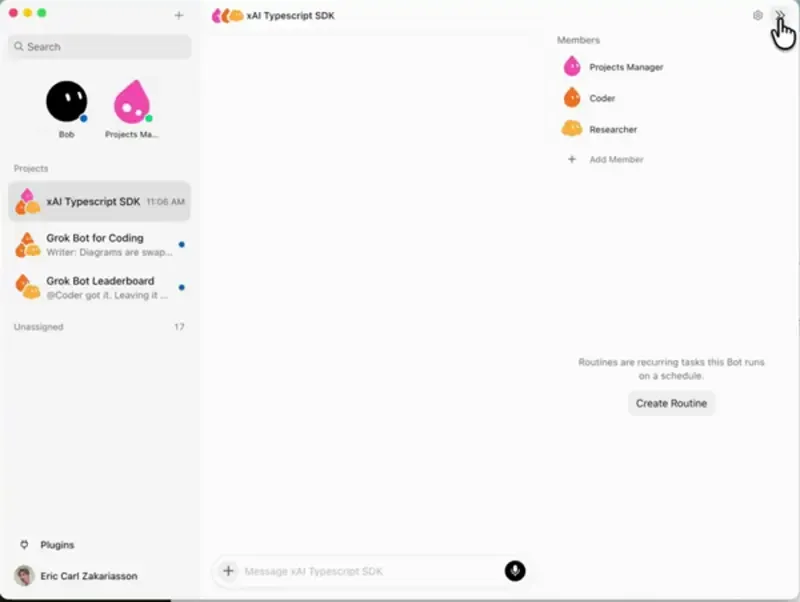
Add Bots when the work naturally splits. Put several Bots in one group chat and use @name to say who takes over:
@Researcher Find 40 prospects that fit the criteria and flag the 10 most worth contacting.
@Copywriter Take the Researcher's 10 names and write a personalized opening email for each.
@QA After the copy is done, check whether the tone reads like a human wrote it.

Don't send anything yourself. One owner per stage, no parallel handoffs.
A common setup is one main Bot acting as chief of staff: you talk only to it, and it assigns work to the specialist Bots. Group chats and handoffs between Bots both use up your allowance, so split only when one Bot can’t finish the job alone.
How to Set Permissions
The dividing line is whether it can be undone.
| Can do on its own (reversible) | Needs your confirmation (irreversible) |
|---|---|
| Drafting, archiving, labeling, organizing, researching | Sending any message to an outside person |
| Building reports and summaries, preparing data | Spending money, committing to prices |
| Sorting, reconciling, renaming | Publishing public content |
| Deleting anything that isn’t junk | |
| Agreeing to or accepting any terms |
In Settings → General → Auto-review, set which actions must be approved first. The official docs flag two things: Auto-review is decided by a model, so pair it with least-privilege access, and an approval covers only the actions that follow, so anything already done is not undone (security details).
What to Know Before You Start
- It’s still in beta. Features and the interface change fast, so tutorial screenshots may differ from what you see.
- Schedules can break quietly. After a site redesign or a connector drop, a Bot may still report done while the result is wrong. Spot-check once a week: did it run, and is the result right?
- Errors in multi-step work add up. Start with low-risk tasks you can undo, and widen the scope once the first few results are stable.
Penchan’s Take
Grok Bot suits chores that repeat every week and span several apps. To try it, pick one thing you will definitely do this week: build a Bot, write the three-part job description, show or describe the process once, set a schedule, and come back the next day to check the run log. Set the schedule loose at first, and add frequency once results are stable.
More hands-on guides for different roles are in the official guides. For a recap of the three-day Grok Bot Galaxy livestream, see the Grok guide.